The installation of this plugin is quite simple.
You install the plugin in the engine and start the respective project. Then activate the plugin under Plugins, you can find it in the category “HappyTurtle Interactive Plugins”.
Once you have done that, you restart the engine and can now insert the clocks.
Create Blueprint #
Now create a Blueprint via “Blueprint Class” and find the class you need for your clock. To use the examples that are included, simply copy them into the content folder.
There are the following classes
- ClockActor (Has no hands and can be used for digital clocks)
- AnalogClock (Is intended for normal watches with second hand)
- AnalogClockWithourSecondHand (Is the same as AnalogClock only without second hand)
- PendulumClock (As the name suggests, this class is for pendulum clocks with a second hand).
- AnalogClockWithourSecondHand (without second hand)
Once you have selected these, add the meshes to the respective existing static meshes in the Blueprint.

Settings #
Now when you’ve done all that, add the Blueprint to your level. Now click on it and in the “Details” you have Clock Settings, with these you can set whether you want real-time or in-game time.
And if you have the pendulum clock, you can also set the speed for the pendulum as well as the radius.

Where are the example blueprints? #
To find the Blueprints that are already included as examples, you just need to enable “Show Plugin Content” in the Content Browser under Settings.

Output time #
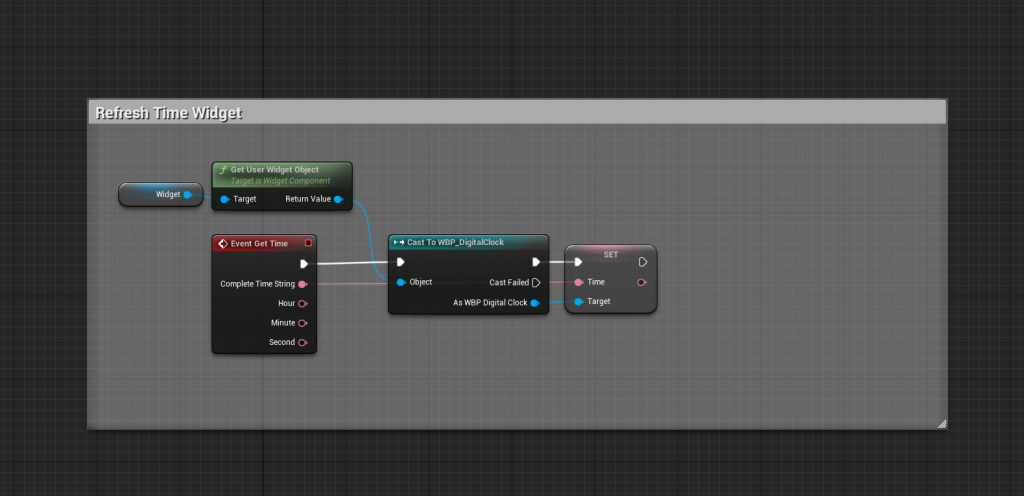
Get the time with the event “Get Time”, an example can be found in the “BP_Clock_Digital_01”.

Help #
If there is a problem, you can always contact us via Discord or email.
